
Add Row
How to connect your Google sheet to add rows using Flows.
Step 1: Set Up a Google Sheets Connection in Flows
- Open Flows and navigate to the Google Sheets app.
- Ensure you use a connection that has editor access to the target Google Sheet.
- If the sheet is personal, add your own Google account in the app settings.
- If the sheet is shared within your organization, use a shared Google account with editor access to the sheet, to prevent disruptions if an individual leaves the company.
- Each connection is tied to a single Google account, so ensure the correct one is used.
Step 2: Configure the "Add Row" Action
- In Flows, select Google Sheets > Add Row.
- Choose the Google Sheets connection that has access.
- Enter the Spreadsheet ID (found in the URL of the Google Sheet).
- Define the range where the data will be inserted (the range of columns to add values to):
- If targeting a specific tab, use for example:
TabName!A1:F1 - If sending to the first tab, use only for example:
A1:F1
- If targeting a specific tab, use for example:
- Input the values in a comma-separated format, ensuring:
- Non-numerical values are enclosed in
"". - Example: "Value 1","Value 2"
- This places:
Value 1in Column AValue 2in Column B- And so on...
- Non-numerical values are enclosed in
Important Notes:
- The "Add Row" action only ever adds a new row; it will never overwrite existing data.
Example Setup:
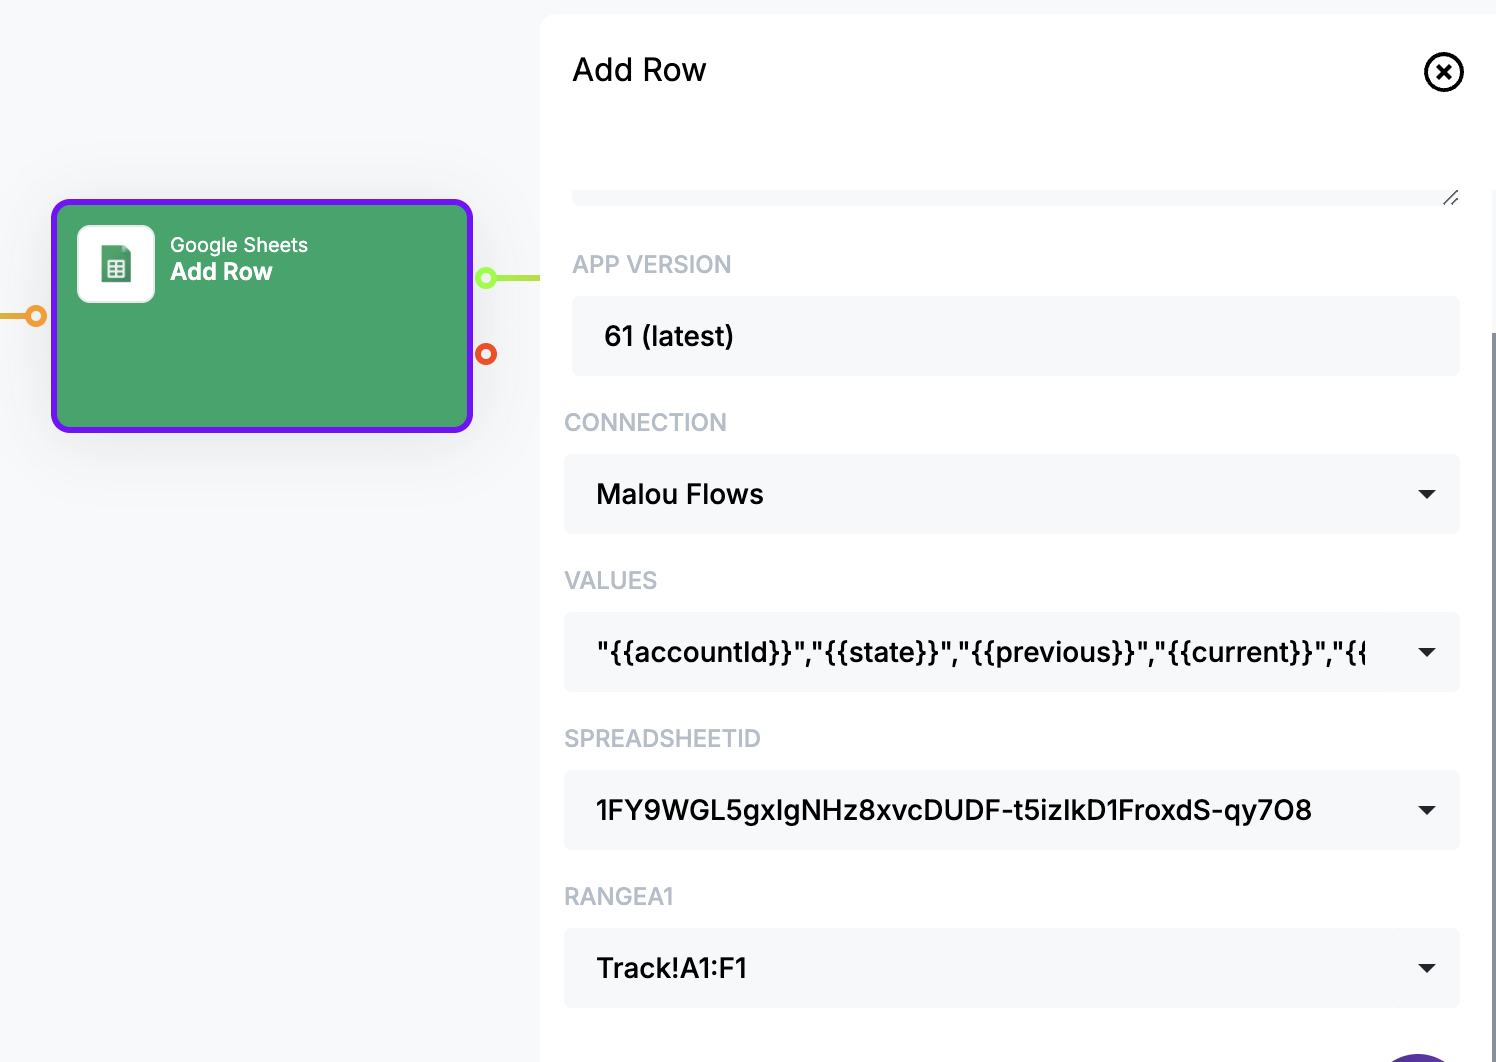
- Spreadsheet ID:
1FY9WGL5gxIgNHz8xvcDUDF-t5izIkD1FroxdS-qy708 - Range:
Track!A1:F1 - Values:
This setup ensures that each new entry is added as a row in the Track tab in the columns A to F on the first available row (if for example 100 rows are already populated with data, the app will add to row 101), with values mapped to the corresponding columns.
"{{accountId}}","{{state}}","{{previous}}","{{current}}","{{timestamp}}","{{user}}"